Behind The Lens: Top Bloggers Share Their Travel Photography Tips

In the past I’ve shared some of my photography tips with you in past articles, for example, in Travel Photography: Mastering Your SLR Camera’s Manual Mode.
For this article, I decided to ask some of my favorite travel photographers what their advice was for people trying to capture beautiful moments on the road.
Without further adieu, I take you behind the lens with some of the most talented photographers in the business.
Needs tips for gear? Make sure to check out this list of important travel photography gear.
Travel Photography: Top Tips
If you want to take photos like you see in your favorite travel books and magazines, these tips can help!
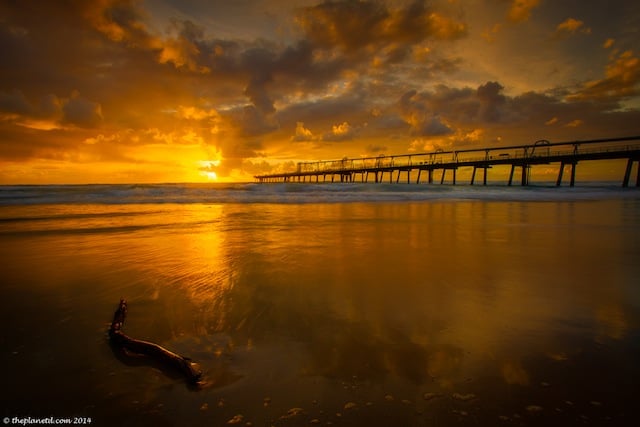
1. “Light is the key to great photography and the best light is in the morning or evening.
You can have the best techniques and the best framing, but if the light is not right, you will end up with a mediocre photo. It’s important to understand the different types of light and how they affect your scene.
Do the long shadows of sidelight add texture to your shot?
Does that front light bring out the clouds more or does backlight make the scene more dynamic?
Ask yourself these questions and then take your time to wait for the perfect light. Patience is a photographer’s best friend.”
-Deb and Dave, The Planet D
2. “I’m often asked about what is the one thing that I would suggest to people who want to improve their photography.
The answer is always the same:
Buy a quality carbon fiber tripod — I use Induro — and ball head, and put it to good use.
People spend hundreds, if not thousands of dollars on cameras and lenses. And yet, when it comes to tripods I often see them try to buy the cheapest thing possible.
That’s a huge mistake.
Remember that your expensive camera and lenses are sitting on that cheap flimsy tripod and if it is unstable and tips over, you’ll have no one to blame but yourself.
Secondly, a shaky tripod is as good as no tripod at all.
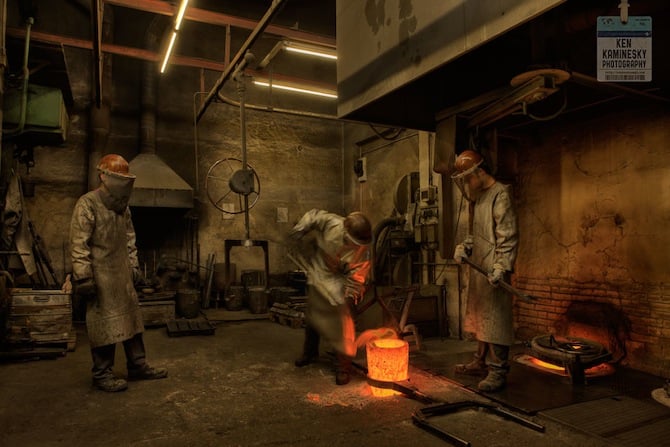
The whole idea is to stabilize your camera so that you can get tack sharp images, so take the time to research what tripod is right for your camera and lens combos. Another benefit is being able to shoot in low light situations without worrying about camera shake.
This shot from a bell foundry in Innsbruck would have not been possible without a tripod to stabilize my camera. You’ll take more time to properly compose a shot when using a tripod and your photography will get better, I promise.”
-Ken Kaminesky, Ken Kaminesky Photography
3. Follow your curiosity. This might seem like a no-brainer for professional photographers, but having no formal training in this craft myself, I’ve found that my best photos are the ones that I took when I simply followed my curiosity.
For me, I’m inspired most by lush landscape and small glimpses into urban life, whether that be politically charged street art or the simple act of watching a local walk across the street to meet a friend.
-Megan Eileen McDonough, Bohemian Trails
4. “When photographing locals, I try to connect with them whether it’s striking up a conversation or just smiling. Even if I don’t speak the language, a smile can go a long way.
After I get to know them briefly, I ask if I can take a portrait of them. Always ask for permission when photographing people, don’t assume it’s ok to photograph them without their permission as this can go against their beliefs.”
-Dario Endara, DarioEndara.com
Learn how to tell stories through photography.
5. “With Instagram, make sure to reply to all comments. Instagram is a community and when you don’t reply, you disregard the value of it as such.
Second, use hashtags!
But never put more than two into your photo’s caption. Instead, leave a comment on your own photo after you’ve posted it to your stream, and in that comment put all the hashtags you want to use.”
-Kirsten Alana, Aviators and a Camera and Instagrammers NYC
By the way, here are some tips for feeling comfortable in front of a camera.
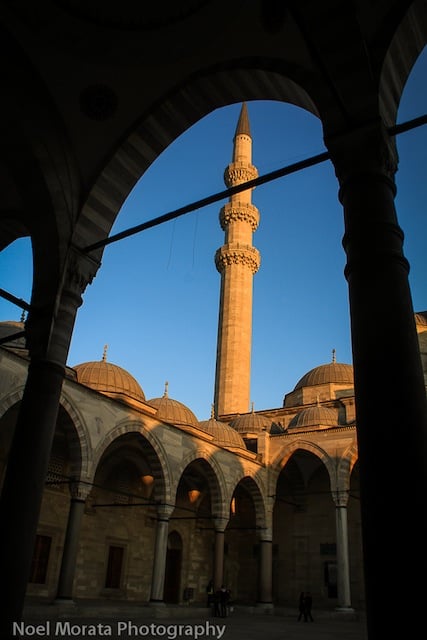
6. “My tip for taking better travel photos is about photographing attractions or famous landmarks.
Once you get the signature postcard or tourist photo taken for your checklist, now experiment look for interesting people to add, cut out the distractions and go in for the detailed shots, walk around and look for interesting angles or perspective.
Wait for the right moments to happen and enjoy the scene while you are waiting an an interesting angle, light or crowds to leave.”
-Noel Morata, Travel Photo Discovery and Noel Morata Photography
7. “The best piece of photography advice I have ever received sounds so easy as to be simple minded.
Frame your photo up just as you like it. Then take two steps directly towards your target.
That’s your shot.
Most people try to do too much and capture too much with each photo — move in, focus in on some aspect of the entire frame that isn’t the entire frame.”
-Michael Hodson, Go.See.Write
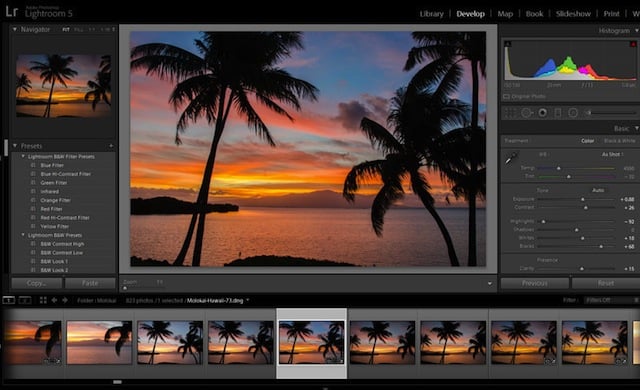
8. “Almost any photo can benefit from small changes to alignment, white balance, color saturation, or exposure.
These changes are cumbersome if you are trying to do them one by one using free online photo editing tools, but they are fast and easy if you invest in Adobe Lightroom (or a similar app for Mac users called Aperture).
Professional photographers use these tools for editing and organizing their shots, but they are easy for beginners to learn, too.
Unlike free alternatives, Lightroom lets you do other useful things like apply edits to multiple photos at once, add custom watermarks, rename photo files, backup your files on import, and organize and tag the photos on your hard drive.
I use Lightroom to organize and edit all the photos I take on both my DSLR and my iPhone, and I highly recommend it if you are serious about improving your travel photography.”
-Cassie Kifer, Ever In Transit
9. “Take a couple steps closer. The biggest mistake a lot of photographers make is trying to get a whole body, a whole face, or a whole building.
Sure, that’s a fine style — but because it’s so normal, people will skip right over it. Instead, find the symmetry that’s there, and show half of it.
Or two-thirds. Or three-quarters — your brain fills in the rest for you when you’re seeing the picture. Look at the details — a shadow, a shade, or somesuch — and let your reader / viewer fill in the rest for themselves.”
-Chris Backe, One Weird Globe
10. “Use natural light and avoid flash as much as possible.
When you use natural light to your advantage, your photos end up looking softer and more true to life.
There’s a human-ness to your subjects when they’re captured in natural light that disappears when you use flash, which tends to wash out your subjects.
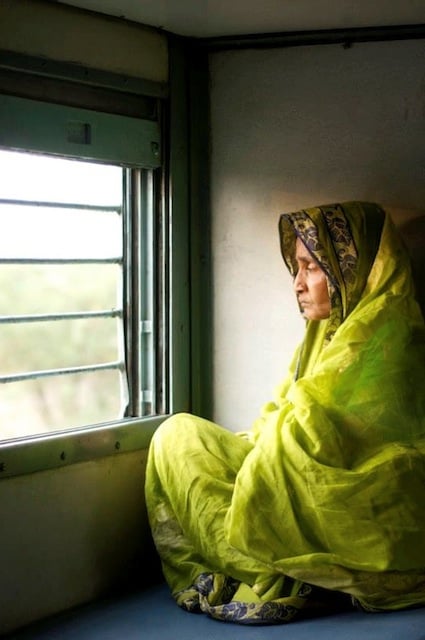
As an added bonus, natural light doesn’t draw attention to you and your camera the way a flash does, giving you plenty of opportunities to capture candid shots like this one of a pensive women on a train in India.”
Connie Hum, Connvoyage
Check out these tips for taking stunning landscape shots.
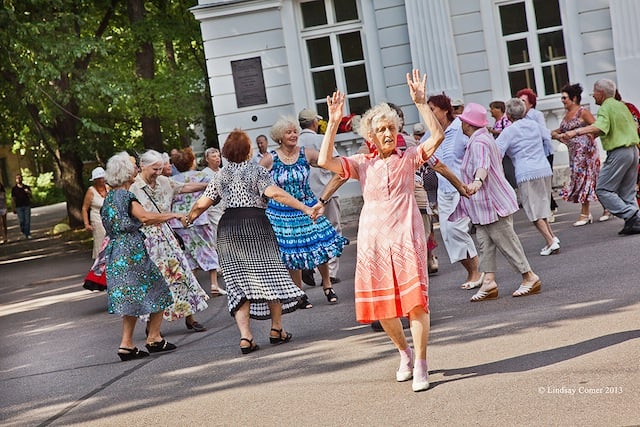
11. “Take a basic photography course and learn how a camera functions on your own.
Once you learn the relationship between ISO, Aperture and shutter speed, as well as the different light metering settings, you can easily put your camera into Manual and give yourself more control over how the image comes out.
Also, always shoot in Raw, or Raw and jpeg. Raw images are like having unprocessed film — you have the ability to adjust the images more because the camera is not adjusting them for you.
Raw images have a higher resolution and can be converted easily to jpeg, png, tiff, etc. Shooting in Raw means you will need a good software to edit and process the Raw images.
Photoshop Elements, Lightroom, Photoshop – all good options. I use Lightroom for almost all editing because it’s all I need. I like to leave my images as real as possible — no crazy editing. Lightroom is great for that.”
-Lindsay Comer, Life in Russia
12. “Sometimes you can improve a picture just by getting up and moving.
I took this top picture of a father and daughter feeding the pigeons by the Toronto City Hall. It is not a great picture. We have three-and-a-half other people cluttering up the frame that does not add anything to the composition of the scene.
Now, I might have just gone over and asked the other people to move… Okay, I would not really do that.
Instead, I got up and moved behind the pair. I also zoomed in closer so that there was less in the frame that I did not want and changed the depth of field so that there is less distraction.”
-Chris Christensen, The Amateur Traveler
13. You don’t need an expensive camera to return from your travel adventure with a collection of great photographs.
You just need to know how to create a photograph with the camera you have. A great starting point is to learn the basic rules of composition – and to know when to break them!
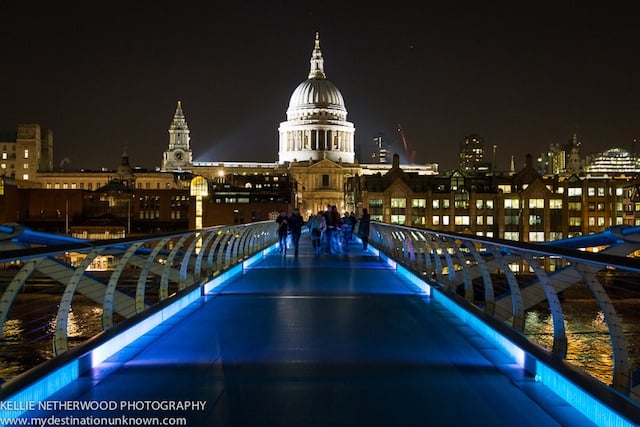
Two of the most common “rules” include leading lines and the rule of thirds. A Leading Line is an effective way of drawing the viewer’s eye through a photograph, usually towards the key subject of the scene.
It might be an obvious road, bridge or river, a more discreet path of pebbles or leaves or a more creative section of a building or structure. It may lead your eye across the frame, to the center or even out of the frame completely.
The basic principle of the Rule of Thirds is to imagine breaking your image into nine parts. Points of interest should be placed on one of the four intersections whilst the horizon should be positioned along one of the horizontal lines.
This comes from the theory that the human eye naturally gravitates to these intersection points. And once you’ve mastered the Rule of Thirds, experiment by breaking it. For example, try placing a single subject of focus in the center of the frame or lower your horizon to draw attention to a vibrant sky.
-Kellie Netherwood, Destination Unknown
14. “Best times of day to take photographs: Aim to take photographs during early morning and late afternoon. The light is warmer which brings out detail and color, unlike the harsh light in the middle of the day.”
-Wendy Connett, Wendy Connett Photography
15. “My best tip for getting good shots is keeping your lens clean. It seems really obvious, but we often forget it when on the road and it will create weak spots on photos that can be hard to make better afterwards.
Just keep a little cloth dedicated to wiping only your lens with you. It’s light and really practical!”
– Jennifer Dore Dallas, Moi, mes souliers
16. “Make sure to shoot every day! Practice, practice, practice. Look for interesting light, composition and the uniqueness of everyday. Also, experiment with manual settings.
Play with exposure and aperture.
Think about the amount of light and depth of field. At the end of the day practice, experiment and play because that’s the way you’ll pick it up.
I’m not a big book reader, the most I read was the camera manual to better understand the settings.”
-Molly Egan, Molly Egan Design
What’s your favorite travel photography tip? Please share in the comments below.
Hi, I’m Jessie on a journey!
I'm a conscious solo traveler on a mission to take you beyond the guidebook to inspire you to live your best life through travel. Come join me!

Want to live your best life through travel?
Subscribe for FREE access to my library of fun blogging worksheets and learn how to get paid to travel more!








Awesome tips! I have been writing a travel blog for years and have neglected my photo taking abilities. I have made it a priority to take better pictures this year and is already paying off. Much still to learn and this definitely helps!
Thanks!
Shaun
http://www.thislifeintrips.com
@Shaun: Glad you enjoyed the post!
great tips! I agree that light is everything.. but sometimes it’s really hard to get up in the morning ha!
Sher
http://www.shershegoes.com
@Sher: So true! 🙂
Hi Jessie, this is my first time on your site and I really enjoyed this post. Seeing the difference between the two photos of the father and daughter has stuck in my mind. Hopefully it will remind me to be less impulsive when capturing a scene. 🙂
@Christine: I think the trick is not to be less impulsive, but if you’re impulsive to take many different shots. Different angles, lighting, perspectives…something will likely come out good 🙂
I am a travel photographer from North East India, these tips will help me further. Thank you very much.
@Bijit: great!
You nail all the points you’ve included in this post. I feel really awkward doing street photography so I like the idea of connecting with strangers to get the shots you want.
I enjoy learning how other people approach photography, it gets me thinking more creatively and trying new things with my own images. I’m still learning by following people like you who inspire me.
James W.
https://www.nickhanyokimaging.com
Great post Jessie among all I really loved your 9th point keep up the good work much appreciated!
This is a great article. Very insightful. Thanks for the post.